
Spinach, Tomato, and Feta Quiche
I think that quiche is one of the most underrated dishes. When you think of breakfast or when you go out for breakfast, it’s not necessarily top of mind. It’s essentially the B-squad to pancakes, french toast, and omelettes galore. In the past year, I have come back to embracing our friend, the quiche. In my family, it has a special place in my heart because it is the dish I had with my family every Christmas morning. My mom always made two quiches, a meat one for the boys and a spinach one for the girls. She would put them in the oven right before we started opening gifts so that they would be ready right as we were wrapping up (pun intended). I always thought that it was such a fancy and immaculate dish and never really tried to make it on my own. When J and I moved into the house and were in charge of cooking for Mother’s Day with his side, I decided to make my first quiche. I, of course, called my mother first to get her tips to ensure I did not deliver a pie crust filled with disappointment. I whipped up a spinach feta quiche and his mom seemed to absolutely love it. PRAISE. JESUS.
This week, J went to Atlanta for a work trip and I knew I needed to pick him up from the airport around 3:30PM. It’s the awkward timing where I knew I would be racing the clock when we got back from O’Hare to try to whip something together for dinner. I wanted to make something ahead that we could eat off of that night and the next day. I had been sick the whole week and really was not in the mood to cook every day. Typical, after several months of quarantine together, he finally leaves town and I am bed-ridden (*eye roll). I opened my fridge and noticed that I had a tomato and some spinach that were on the cusp of going bad, so I knew I wanted to do something with those (most of my dinner ideas are inspired by all of the veggies I bought when I was feeling like a healthy goddess, only to order DoorDash the next 4 days until my produce is on it’s death bed). That’s when I remembered that I still had another frozen pie crust in the freezer. Alas, the gods have spoken and I am destined to make….a quiche!
I started by setting the oven to 350 degrees and using a fork to poke holes in the pie crust. This essentially allows the crust to “breathe” in the oven so that it maintains it’s form and does not puff up. You can, of course, make your own pie crust if that’s more your cup of tea. I reserve that for when I make actual pies. A homemade crust certainly tastes better, but it is an absolute beyotch to make, takes more time, and makes more of a mess. So, for this quiche, I enlisted the help of my hommie, the Pillsbury dough boy.

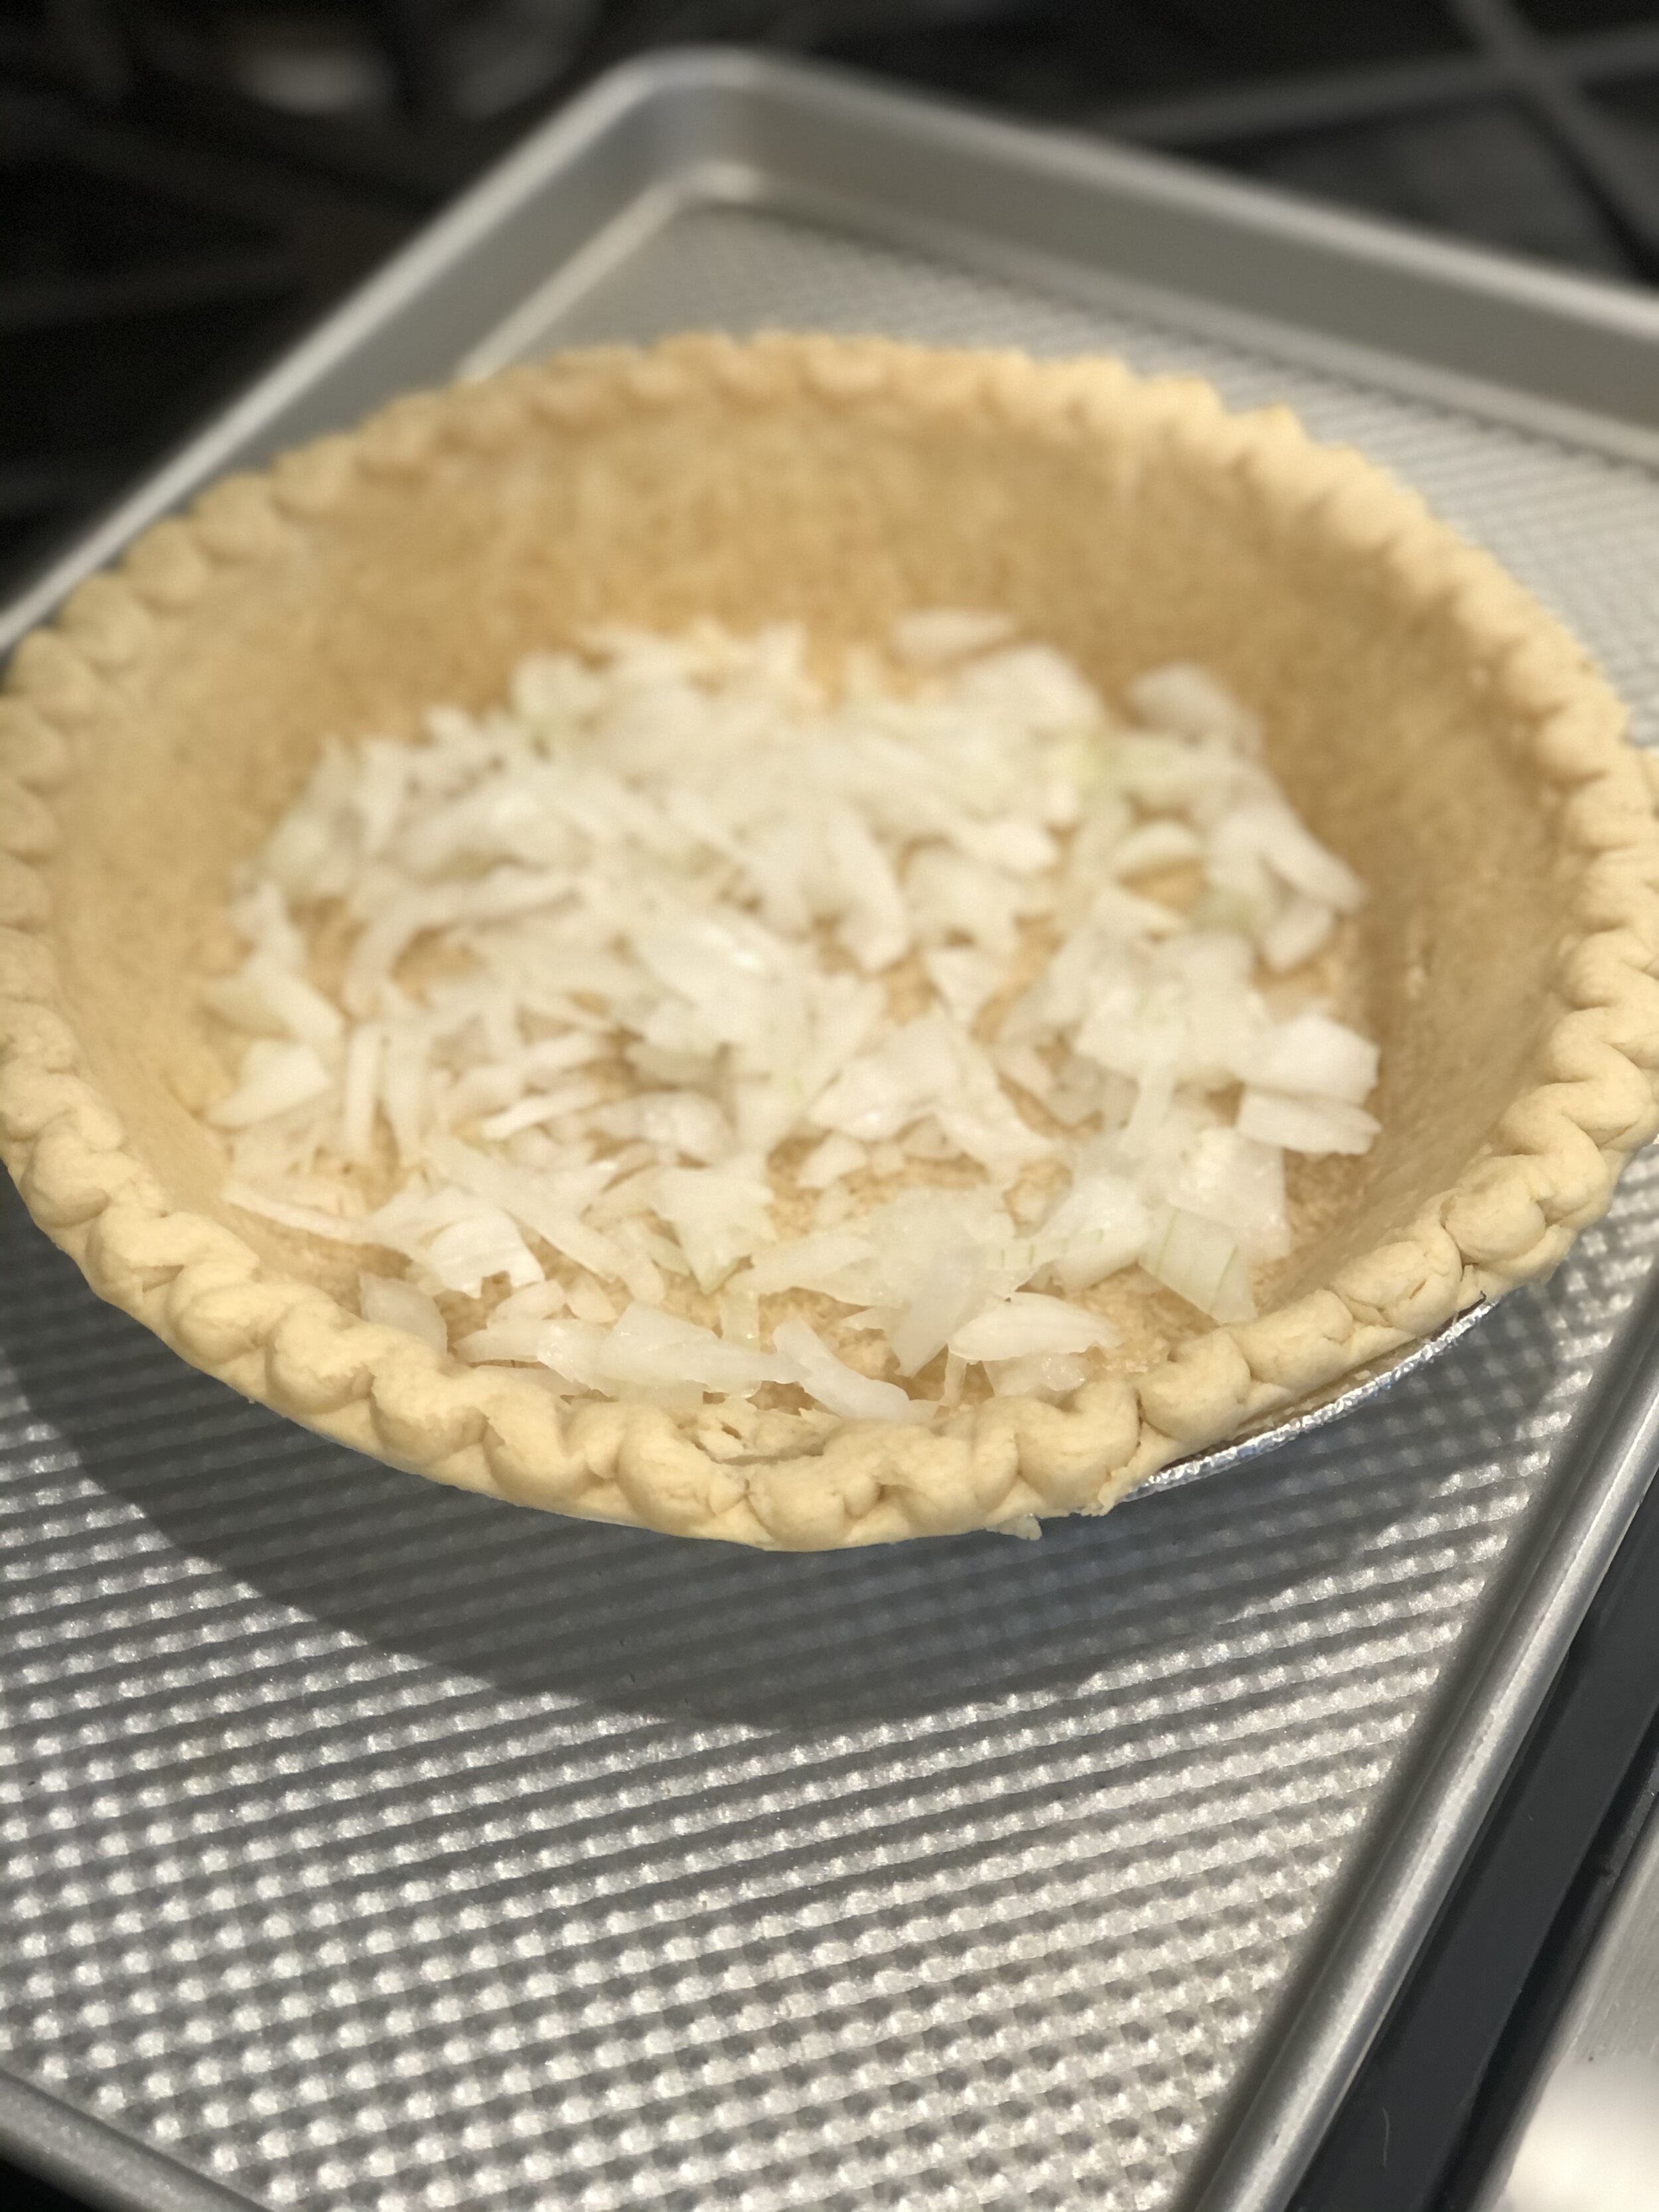
I put the crust in the oven for 10 minutes, enough time to warm it up without browning it or fully cooking it. While the crust is warming, I start preparing the filling. You can get pretty creative with a quiche and what you want to put into it. I decided to chop up a yellow onion, a Roma tomato, and some spinach. Again, there is no right or wrong answer to how much you add to your crust, just be conscious of the fact that the more volume you add, the longer cook time that you will need.

Once you have your ingredients prepped and ten minutes have passed, you can pull you pie crust out of the oven to begin assembling the quiche. For this portion, I always place the crust on a baking sheet. Should the contents of the quiche spill over, this helps to keep your oven clean.
I start by layering my veggies on the bottom. You can be the judge of how much you want to add. I sprinkle my chopped onion on until it has completely covered the bottom of the crust. I personally love the flavor and texture of onion in a quiche so this is an ingredient that I am not shy with. I then place a layer of tomatoes over the onion, followed by another layer of spinach.


At this point, I am ready to add my cheeses. If you want to be healthy or whatever, I guess you can skip this step. I WILL absolutely judge you because cheese is life, but you do you.
I typically make a spinach feta quiche, so I definitely wanted to use feta in this recipe. I had a huge bag of shredded cheddar leftover from when I made chili, so I decided to incorporate that as well to add a sharp bite (it also makes for a pretty color and I am vain and care about those things). This recipe would also be great with parmesan and Romano, or a bit of mozzarella.


Alright, now you are ready to bake your quiche! Lol just kidding, ya’ll know you can’t make a quiche without eggs.
These store-bought crusts are usually on the smaller side and not as deep as if I were making a homemade crust in one of my pie pans, so I typically will use 5-6 eggs for these. In an effort to be healthier, I decided to use 4 eggs and then fill the rest with egg whites. This is a common method for me- I use a calorie counter app quite a bit just to make sure I am conscious of what I am consuming. When I make eggs in the morning, I realized that it can quickly eat up a large portion of your daily caloric allowance if you are not careful (eating whole eggs, adding cheese, cooking in butter, etc). Egg whites are very low in calories, but I also cannot commit to just eating strictly egg whites. I always need to mix them with whole eggs because ya girl still cares about dat flavor!
Once I have beaten my eggs together, I add in my seasoning. As always, salt and pepper are a must with eggs. I then added a dash of red pepper flakes for some subtle heat, and a bit of minced garlic. You can always use garlic powder instead, but I wanted to keep with my theme of fresh ingredients for this one. Once your mixture is ready, pour it into your pie crust, distributing it over all of the veggies to ensure the eggs are filling the whole crust.


The final step prior to baking the quiche is to add butter. This is not necessarily a priority in baking a quiche, but I love butter and think that it compliments the buttery crust. So, if you are like me, feel free to Paula Deen the crap out of that quiche.
I will typically hack off about a tablespoon of butter and then cut it into small cubes to distribute amongst the top of the quiche filling. Just know that if you add too much butter, it will create more a liquid consistency on the top of your quiche. It can then be difficult to know whether your quiche is fully cooked, as it can be hard to tell what is butter and what might still be raw egg.


Now you are ready to bake your quiche! This should bake for about 55-60 minutes, depending on how dense you make your quiche. Once the edges are starting to brown and the quiche starts to puff up, leaving no liquid visible on the sides of the crust, you know your quiche is done.
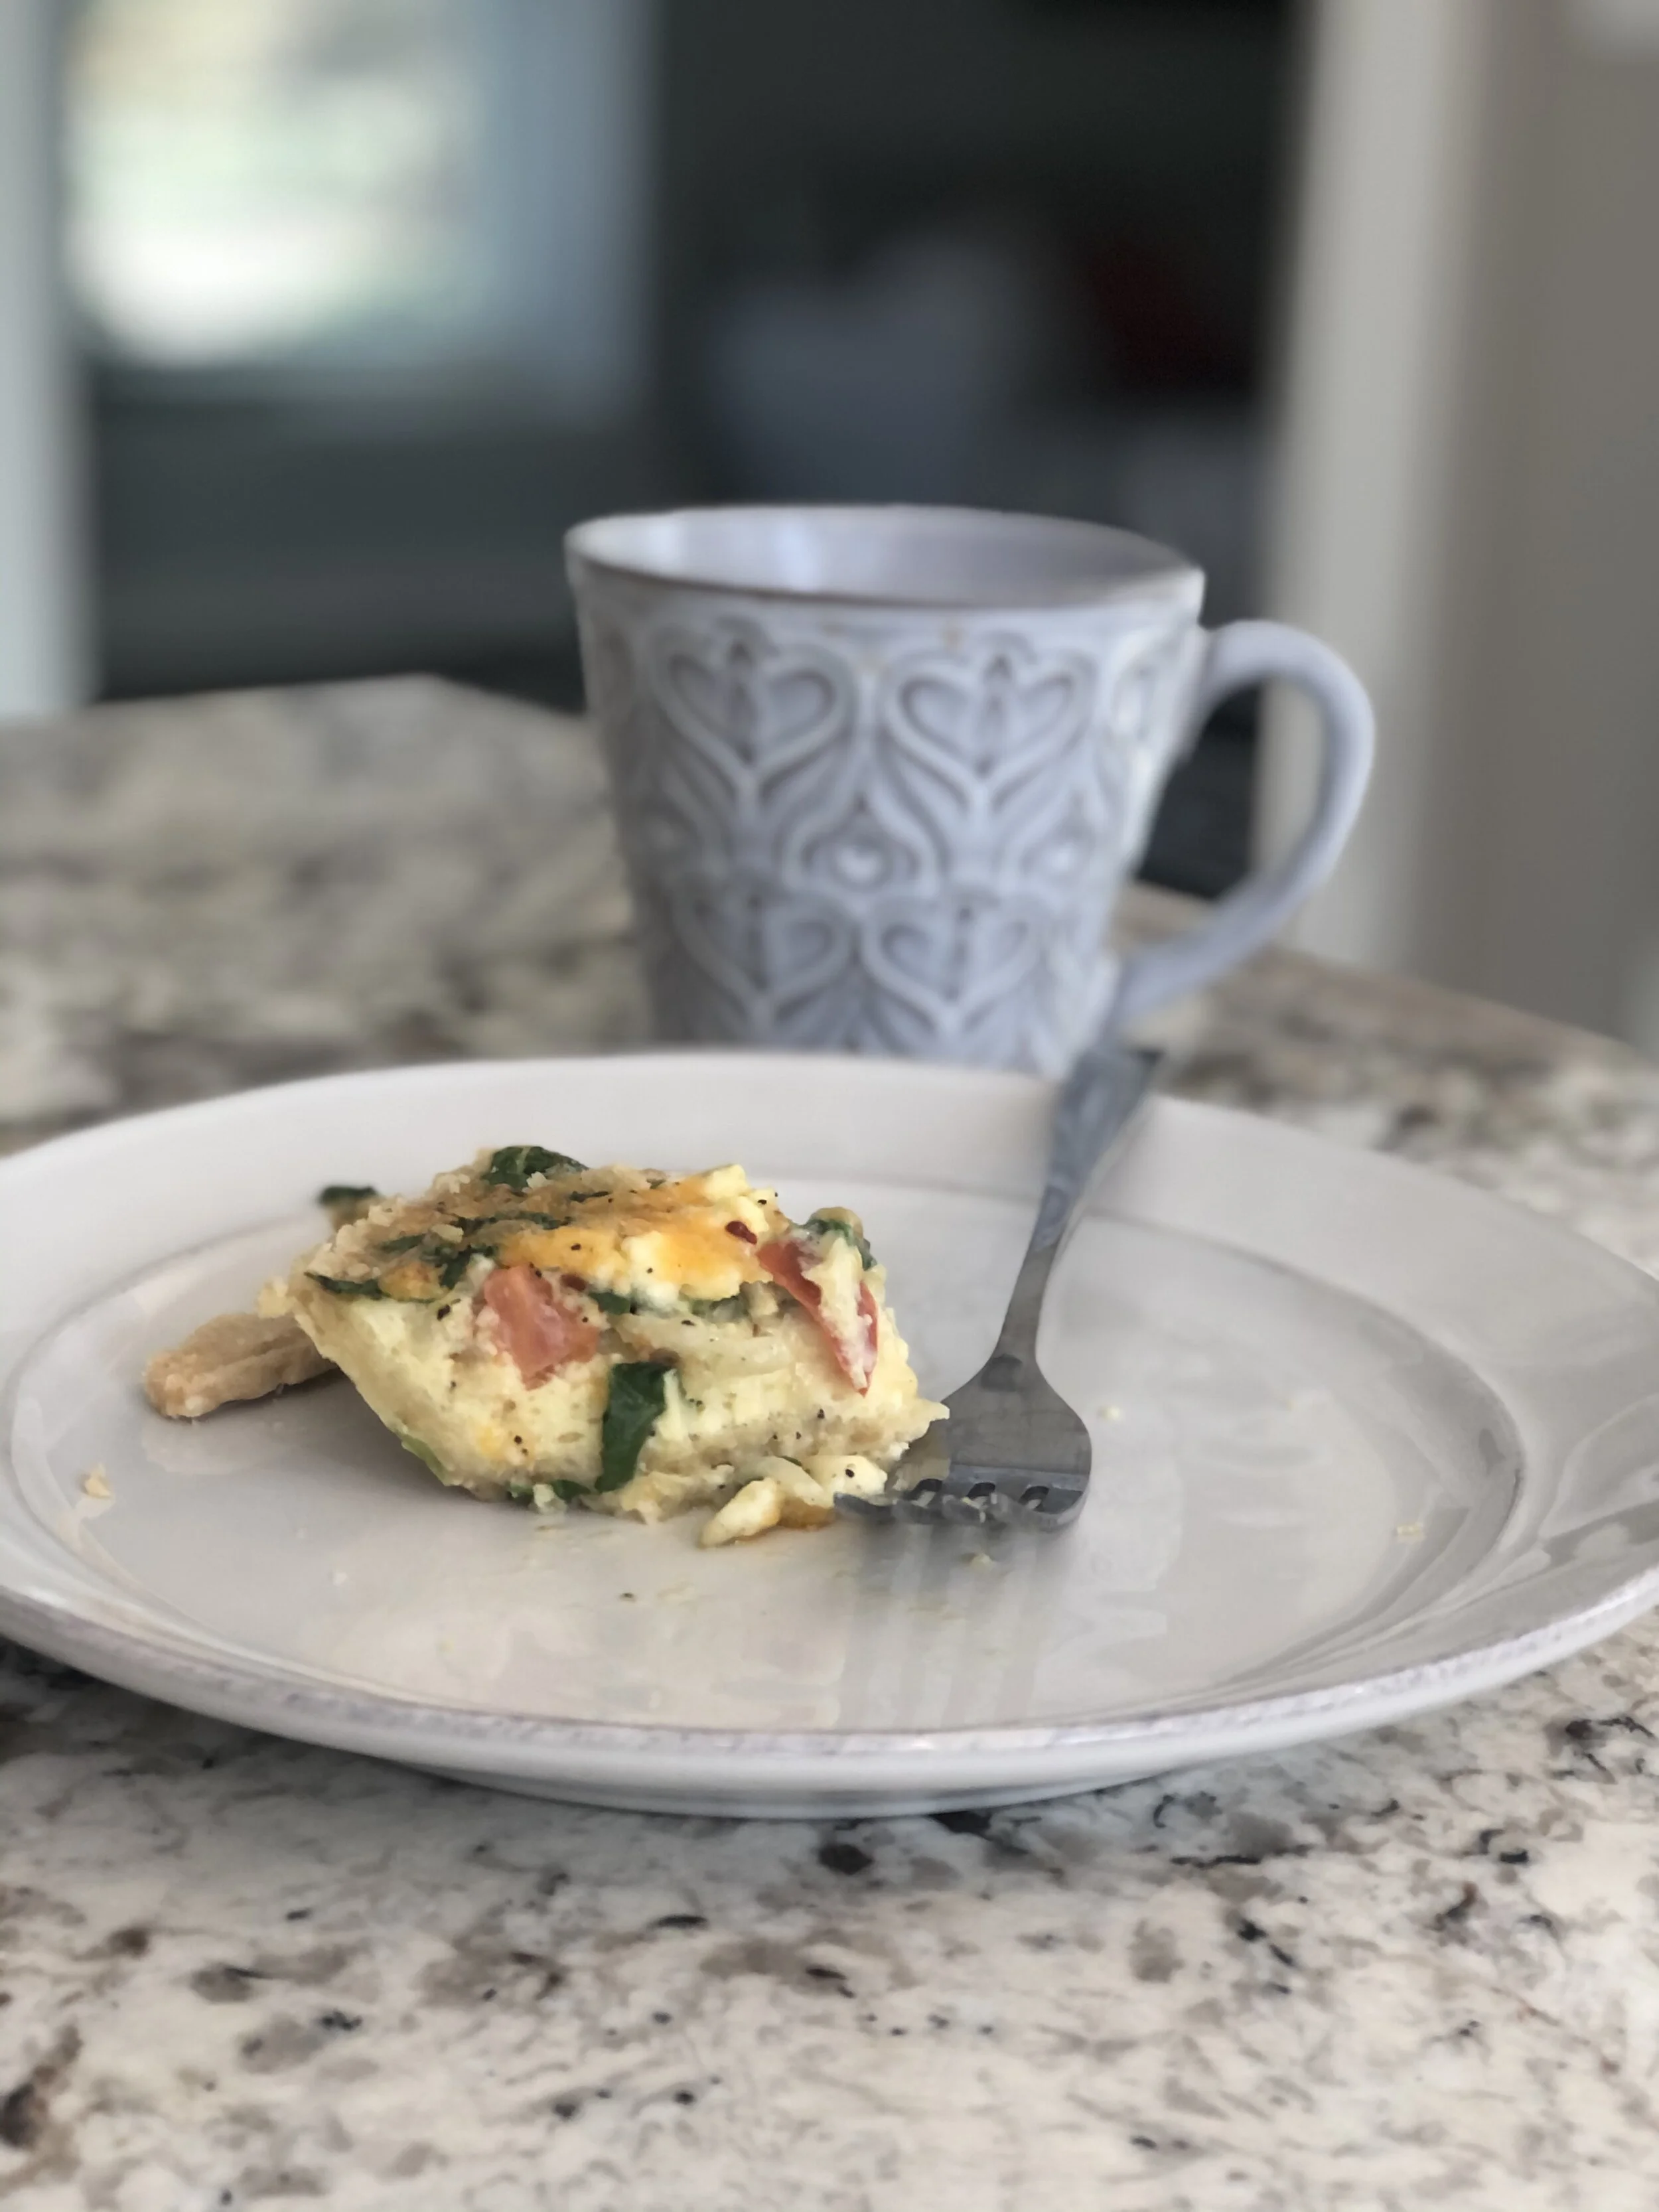
Quiche is not necessarily something that you think of when you imagine “meal prep”. It is kinda the sneaky dish that serves an amazing purpose for picking at throughout the week. We have heated this up for breakfast, lunch, and dinner the past few days. It keeps it’s flavor and is actually pretty tasty as a “leftover”, and is something super quick and easy to make when you don’t want to cook. Someday, I might feel fancy and actually roll out a pie crust and put tons of love and care into my quiche. Until then, this is what ya get!

INGREDIENTS:
1 Frozen Pie Crust
1/2 Small Yellow Onion (or 1/4 of a larger onion)
1 Roma Tomato
3/4 Cup Spinach
4 Large Eggs
3/4 Cup Liquid Egg Whites
1/4 TSP Salt
1/4 TSP Pepper
1/4 TSP Red Pepper Flakes
1/2 TSP Minced Garlic
1/4 Cup Crumbled Feta Cheese
1/4 Cup Shredded Cheddar Cheese
1 TB Butter, Cubed
DIRECTIONS:
Begin by setting your oven to 350 degrees and preparing your pie crust. To do so, you will want to thaw the crust for a few minutes until it is soft enough to poke holes in it with a fork. Generously poke the crust on the bottoms and sides to ensure there is plenty of room for air flow
Place the crust in the oven for ten minutes, then remove and place on a sheet pan.
Begin preparing your vegetables. Chop the onion and tomato into small pieces and set aside. Then begin cutting your spinach into strips. Grab a handful, roll all of the leaves up into a bundle, and then cut into strips.
Now, place your veggies into the bottom of the pie crust. I do them in layers- first onion, then tomato, then spinach.
To prepare your egg mixture, crack your eggs into a bowl, then add the egg whites. Beat the eggs with a fork or whisk until all of the yolks are broken up and distributed. Then, add the salt, pepper, red pepper flakes, and garlic, and whisk until distributed. Pour the egg mixture over the veggies in the pie pan. I do this in a circular motion, starting in the middle and spreading the mixture to the sides to ensure it is evenly distributed.
Add your cheeses over the top of the egg mixture. Break up any larger pieces of feta into smaller pieces so that it is evenly distributed.
Cut one tablespoon of butter into small cubes, and distribute it on the top of the quiche mixture.
Bake the quiche for 55-60 minters, until the egg mixture starts to puff up and no additional egg liquid can be seen on the sides.

Lazy Eggs Benedict
I was on my way home from a run the other day and was cravingggg Eggs Benedict. I have no idea why because I think I have eaten that dish, like, 5 times in my entire life. When we went to Mexico, they had the most amazing Eggs Benedict at the resort and I think the extreme heat from the run had me reminiscing! I got home and googled the recipe..WHOAH. First of all, I didn’t have even half of the ingredients I actually needed to make it. Second of all, I never realized how unhealthy it is! Nonetheless, my craving was still there and I started pulling ingredients out of my fridge to see what I could come up with that could be a close second.
I did end up having eggs and English muffins so we were off to a killer start (don’t really know how I could have followed through without at least having these)! Instead of Canadian Bacon, I opted to go with deli meat. The turkey is much leaner and you can control how much or little of the meat you want to have based on the thinness of the turkey. For the sauce, I knew I needed something creamy. I thought about making a concoction with mayonnaise but, let’s be honest, there is no way that would end well for me. Then, I remembered that I had this sauce. I bought this bad boy at Target for the first time last year and I think we have been through three bottles. I put it on fish, chicken, you name it and it tastes good!


To get started, I turned the heat under a skillet to medium-high and popped my English muffins in the toaster for 3 minutes. I always have Thomas’ English muffins because I can buy the light ones but I fully recommend Bay’s. We bought these during quarantine when everything was sold out and they ended up being way better. They come pre-sliced and they are thicker and fluffier than the Thomas’ brand.
Once the pan is hot, I crack two eggs into the pan and sprinkle with sea salt and pepper. You can cover the pan to cook them quicker and more thoroughly, but I like my eggs a bit crispy on the edge and runny in the middle, so I just cook them as is. After about 5 minutes, these bad boys are ready to go!


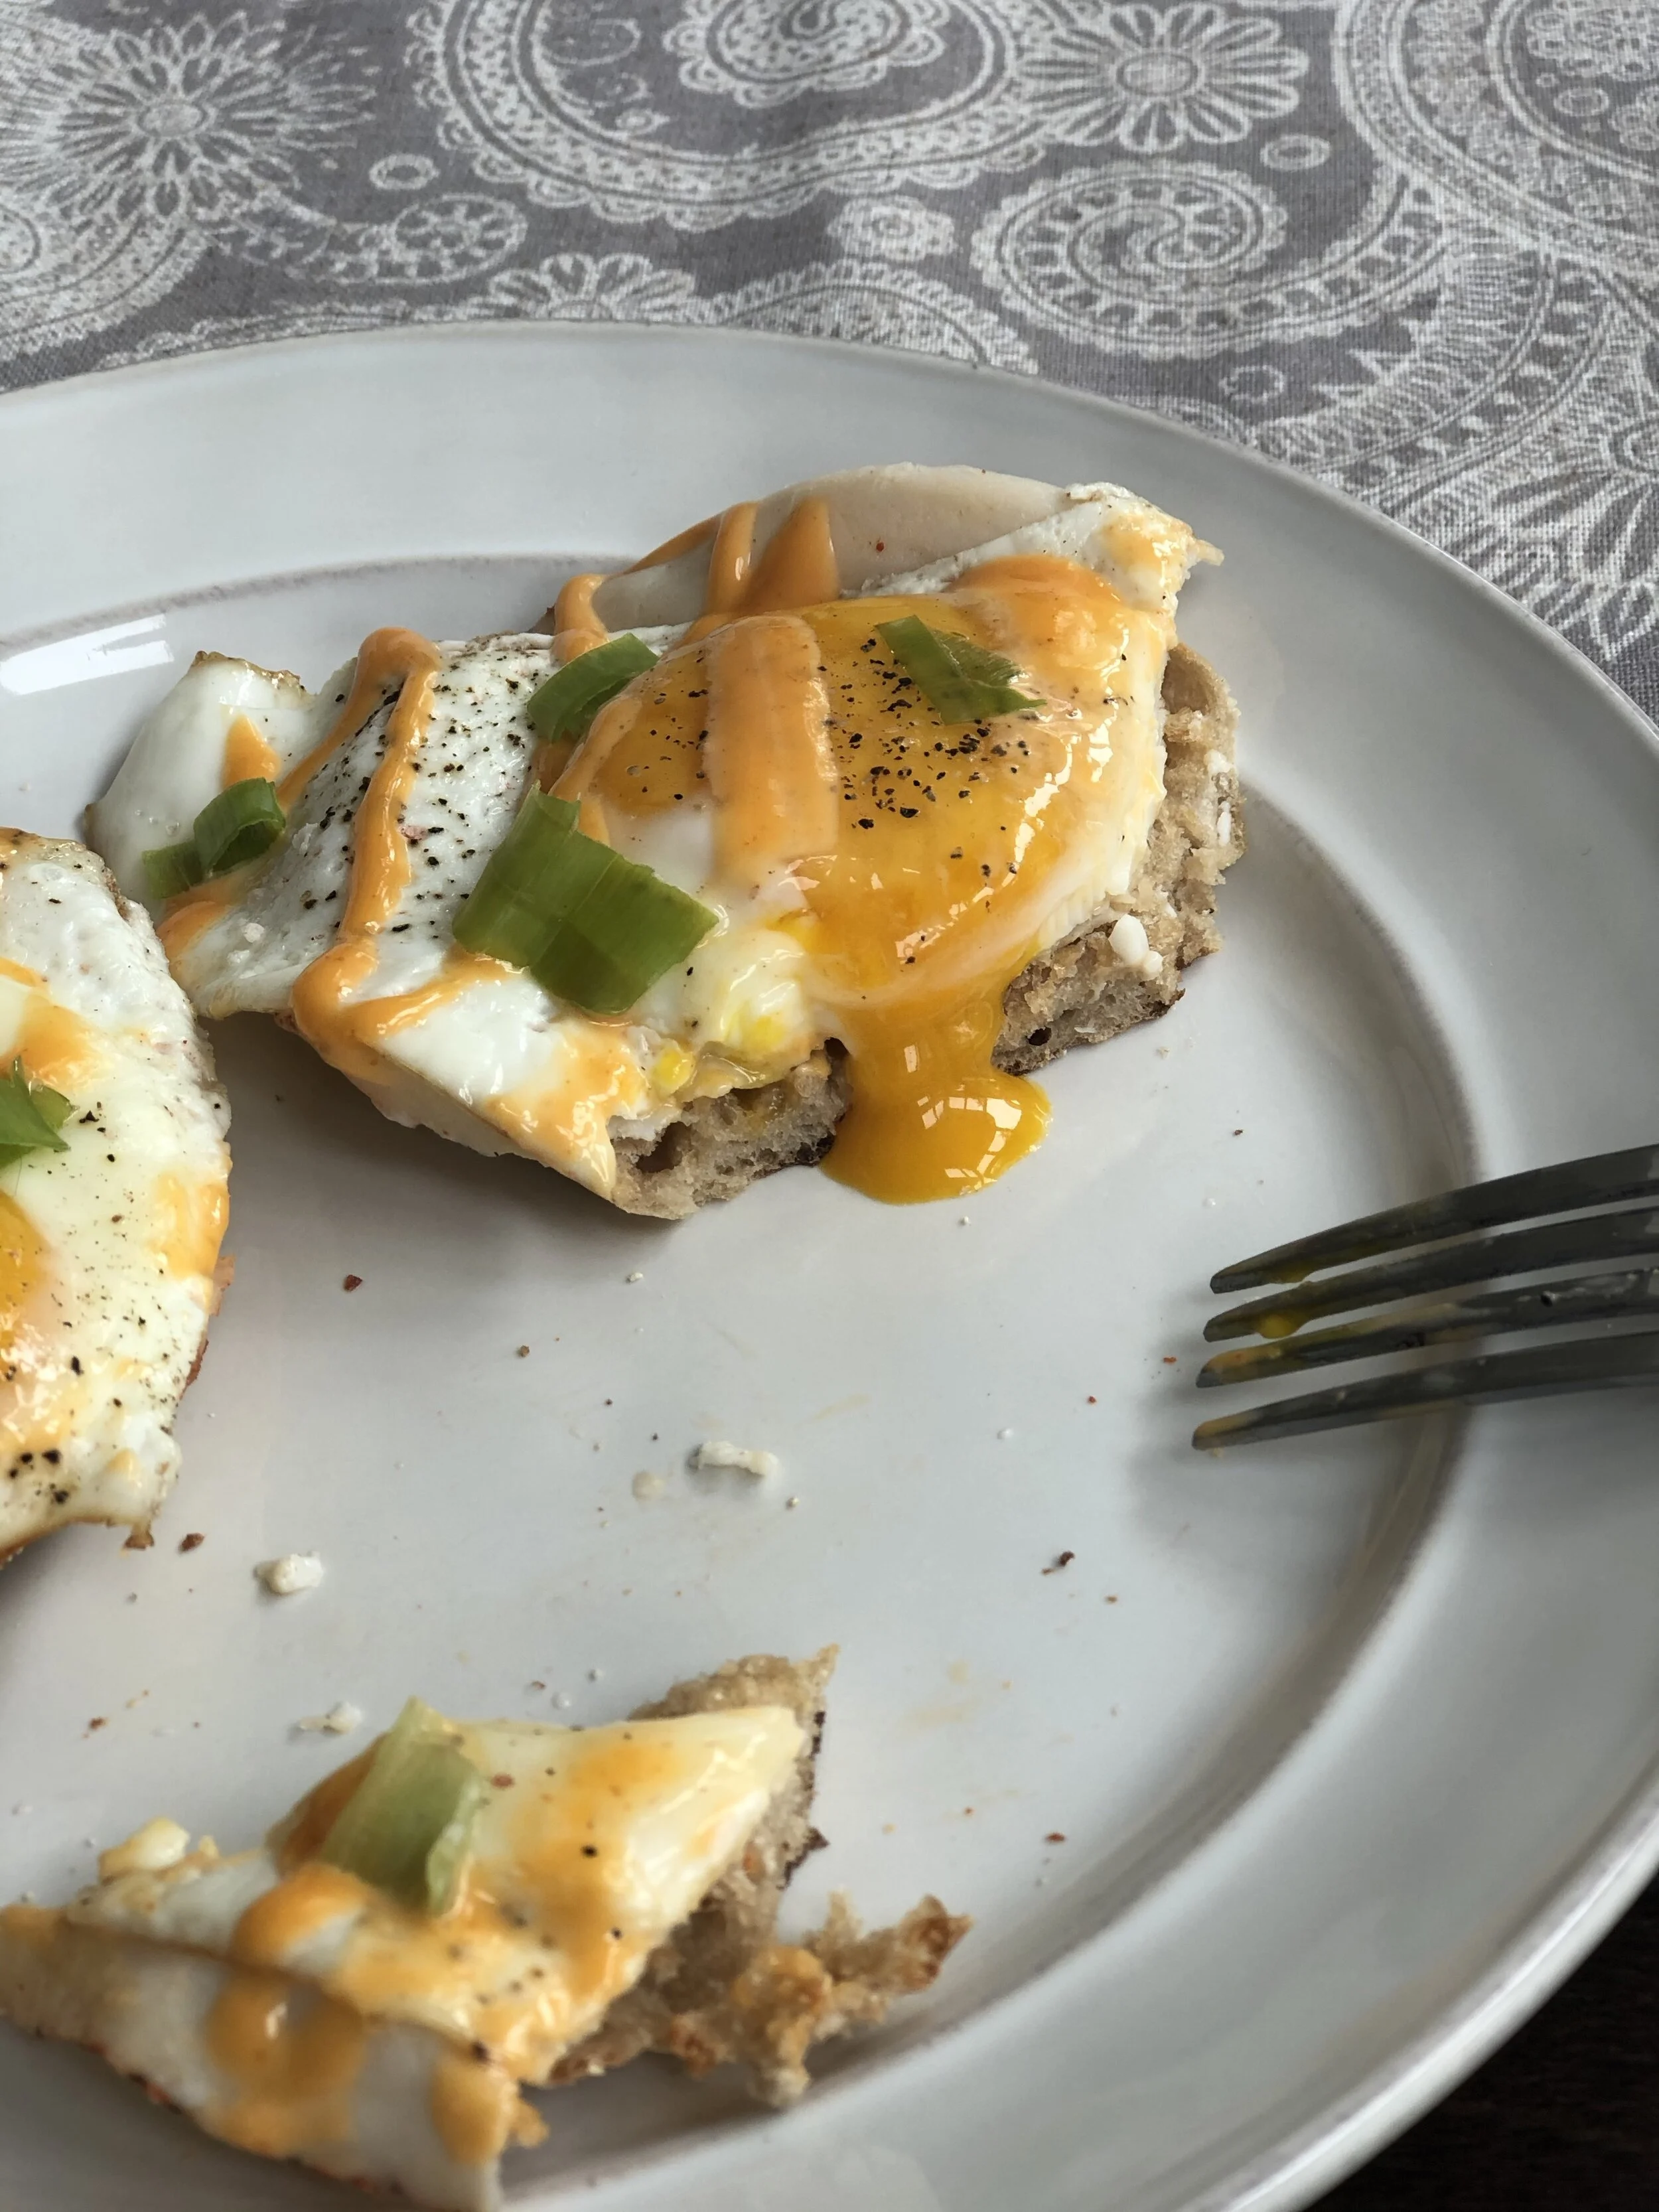
At this point, it is time to put this bad boy together. Start by placing your turkey on your English muffin. I chose to just do one slice each and went with a mesquite turkey to compliment the Sriracha sauce. Then, place your fried egg on top of the turkey, and drizzle the sauce on top. Finally, I top the whole thing with shredded green onions. This cuts the heat of the sauce and adds a nice tang.
This whole thing takes under 10 minutes to whip up and it is amazing! No, it is not eggs Benedict, but it is dang close and easier on the waist line. J and I have been eating this almost everyday for the past two weeks. I’m sure we will get sick of it…eventually.
If you really want to spice it up, I would serve this with a Mimosa. Booze is always a good idea friends. Especially when you and the future hubs are quarantined together for 5 months with literally nothing to do ;)

INGREDIENTS:
1- English Muffin (cut in half)
2- Large Eggs
2-4- Slices of lunch meat
3 TB- Lee Kum Kee Sriacha Mayo
2 TB- chopped Green Onion
Salt and Pepper to taste
Super Simple Tuna Salad
I love a recipe that requires no cooking, creates minimal messes, and can be whipped up in a matter of minutes. This past Sunday, J and I had both been running around all morning, worked out together in the afternoon, and were completely pooped by the time lunch rolled around. Neither of us were really in the mood to cook and we both wanted something light, given that it was, like, 100 degrees out that day. As we stood in the kitchen, hoping for food to magically appear, J made the suggestion of tuna salad. I lit up, as that sounded amazing and would never have occurred to me. I pretty much always have a few cans of tuna and chicken in the pantry, and I pretty much always forget that they are there. I shooed him out of my way so that I could start whipping up some magic.
The glory of tuna salad (or chicken salad, for that matter), is that you can basically just start tossing things in a bowl and there will be a solid chance that it will taste good. To start, I brought out my usual basics. Anytime I make chicken or tuna salad, I include light mayo, yellow mustard, and relish. From there, you can really dress it up however you want. Sometimes I go for a sweeter version, but yesterday I went for a little heat. I decided to add in Frank’s hot sauce, and then cut it with some dill and minced garlic. The dill made it a bit more refreshing and the hot sauce was subtle enough that it was not really a flavor you noticed right out the bat. Sometimes, I will cut up a few Famous Dave’s Spicy Pickles and throw them in the mix. This adds a bit more heat and more crunch, which I love in a tuna salad. I also always hit it with some salt and pepper at the end, but don’t go crazy. The glory of this recipe is that you can alter it however you want, and you really just throw a concoction into a bowl, mix it up and you are good to go. I made a smaller batch yesterday because we were looking to chow down quickly so that we could veg on the couch and watch a movie. When I make a larger batch, I will usually double or triple this amount and store it in the fridge for the week. The glory of this is that you can mix it up however you want. You can eat it straight, put it on a croissant, or you can throw some bread and Swiss in the mix and make a killer panini.
This was a short post with minimal pictures but there is not really a lot to show considering that it was super quick and just a hodge podge of ingredients in a bowl!

I pretty much always buy the Costco tuna. It is way cheaper than buying at the grocery and I know I love it. Sometimes you buy tuna and it is a purple-pink color and it FREAKS. ME. OUT. Costco tuna is a safe zone, people.

I am pretty sure there is no appetizing way to photograph tuna salad, but this is all I got. I promise it’s good!
INGREDIENTS:
2- 7oz cans of Albacore Tuna, drained
2.5 TB- Yellow Mustard
3 TB- Mayo (I use light mayo to feel better about myself ;) )
4 TB- Relish
2-3 TB- Frank’s Red Hot (I go for 3 because we like more heat)
1 TB- Minced Garlic
1.5 TB- Dried Dill (Feel free to use fresh if you are fancy like that)
Salt and Pepper to taste
Optional: ~5 Famous Dave’s Spicy Pickles, chopped
Dijon Dill Salmon
If you hate mustard, you should probably just stop reading now. This recipe will be the actual worst thing for you. Me- I am good with mustard, I was given no choice. Growing up, my mom always had 10 different bottles of mustard at our house (not even kidding). I am actually not even sure if I like mustard or if I have drilled into my mind that I am supposed to like it but, nonetheless, it is in my house now and I decided that I needed to cook something with it.
Mustard can be very overpowering so you have to pair it with the right fish. Salmon is a pretty fishy fish (at least I think so), so that is what I went with. Also, it’s literally all that I had in my house because, you know, quarantine.
As always, I started by defrosting my salmon, cutting it into two filets, and then sprinkling each side with salt and pepper.

When it comes to sauces, I love to concoct to see what pairs well and to try to come up with new flavors. Full disclosure, I had actually started this recipe trying to make a sauce with Hoisin, garlic and orange. It was V disgusting so I had to throw it and and start over. Hence, mustard sauce!
I bought these small bowls from Joanna Gaines’ section at target when we first moved into the house. Wasn’t sure what I was going to do with them but when you are a new homeowner, a basic B, and in the clutches of target…you often leave with hundreds of dollars worth of pure crap and then get home feeling like you blacked out and remember nothing that happened in that store. The plot twist is that these little numbers are some of my most used kitchen items. On top of using them for dipping sauces when we have people over, I have also used them as my staple pieces to mix up my concoctions. I will usually start by pulling random items out of the fridge that I think might pair well and laying everything out on the counter. Once I feel like I have a good starting lineup, I start dumping things into the bowl until I feel like I have a winner.
The lemon and dill are two items that I feel always pair well with salmon. After a daring taste test, I confirmed that they paired well with the mustard…phew. I added the half and half to thicken the sauce and to make it a little creamier. I had this container left over from making Mother’s Day quiches and was also looking for any reason to get it out of my house. The garlic comes into play because I am pretty sure I do not have the ability to restrain myself from cooking anything with garlic. It is a life source in my household and I try to look normal by constantly refilling this small, normal sized garlic container from the massive one that I buy at Costco and keep hidden from anyone who might judge me.


Alright, once I have a sauce concocted that I feel is edible, I am ready to start the salmon. I debated putting the sauce in the pan first and then cooking the salmon, but instead opted to go the safe route and add it at the end. Once my olive oil was heated in the pan, I added my salmon. I seared the first side for about 3 minutes, then flipped it once I could tell that there was a nice crust but the inside was still semi raw.


Pretty much immediately after flipping the salmon, I spooned the sauce over the top so that it could sit while the second side cooked. I did this rather than adding it after the salmon was fully cooked so that it had some time to soak in. The sauce is pretty thick so it sits on top of the fish nicely and only runs down the sides slightly, which is exactly what I wanted.
To finish, I just needed to figure out a side dish. I usually opt for rice when I make salmon because the sauce runs into the rice and everything pairs nicely. I didn’t feel like mustardy rice sounded appealing at all, so I opted to just heat up leftover buttered noodles that I had made the prior weekend when we had friends over. This was a staple dish for me growing up. Our special treat every year for our birthday was that we could pick whatever we wanted and my parents would cook it for us. I ALWAYS picked buttered noodles. I think it drove my parents crazy. “Kid, you can have whatever you want! Steak, lobster, anything!” But nope, I alway stuck to my guns on this one. Now that I’m older and no longer have the metabolism of a jackrabbit, I rarely let myself eat pasta, so when I have it I am on cloud nine!


So there you have it! Outside of concocting the sauce, this whole meal can be made in under 10 minutes. It was super easy and adding the pasta made for a more filling salmon dish that usual. It is certainly not something that I would eat every night because, you know, mustard, but it was a nice change up that day from our usual sauces. Buon Appetito!

INGREDIENTS:
2 Salmon Filets
4 T Dijon Mustard
1 T Half and Half
2 T Minced Garlic
1 Tsp Dried Dill
1/2 lemon, juiced (I had a massive Costco lemon so otherwise sub a whole lemon if it is smaller)
Salt
Pepper
2 T Olive Oil
Spicy Shrimp Stir Fry
There are four food staples that I always keep in the house: chicken, ground beef, shrimp, and salmon. I buy these in bulk at Costco and keep them in the freezer for weeks at a time. The trick is thinking up creative ways to make meals out of these staples so that we don’t get sick of them. Per J’s trainer, we prep chicken and rice for lunches every week and I always make a little bit of extra rice so that I can add it to healthy dinners as well (I also may or may not have used one of these healthy chicken and rice dishes to dump over nachos this week but we won’t talk about that). Once I was three Justin Bieber songs and a glass of wine deep last night, I was feelin spicy, and opened up my fridge to think of something to make for dinner. I found half of an onion and a big bag of bell peppers, so I decided on as spicy shrimp stir fry.
I started by heating oil in a pan and chopping up the bell peppers and onion into small pieces. I also had a spare jalapeño leftover from the time I tried to make spicy margaritas. They tasted like literal garbage, hence the extra jalapeño lying around. Like, imagine someone dumping tequila down your throat and then slapping you with a jalapeno…that’s what I made. Anyway, I chopped that up into small pieces and then added the mixture to the pan. I topped the veggies with salt, pepper, minced garlic, onion powder, cilantro, and crushed red pepper. I then stirred everything to combine and lowered the heat to a medium-high setting.
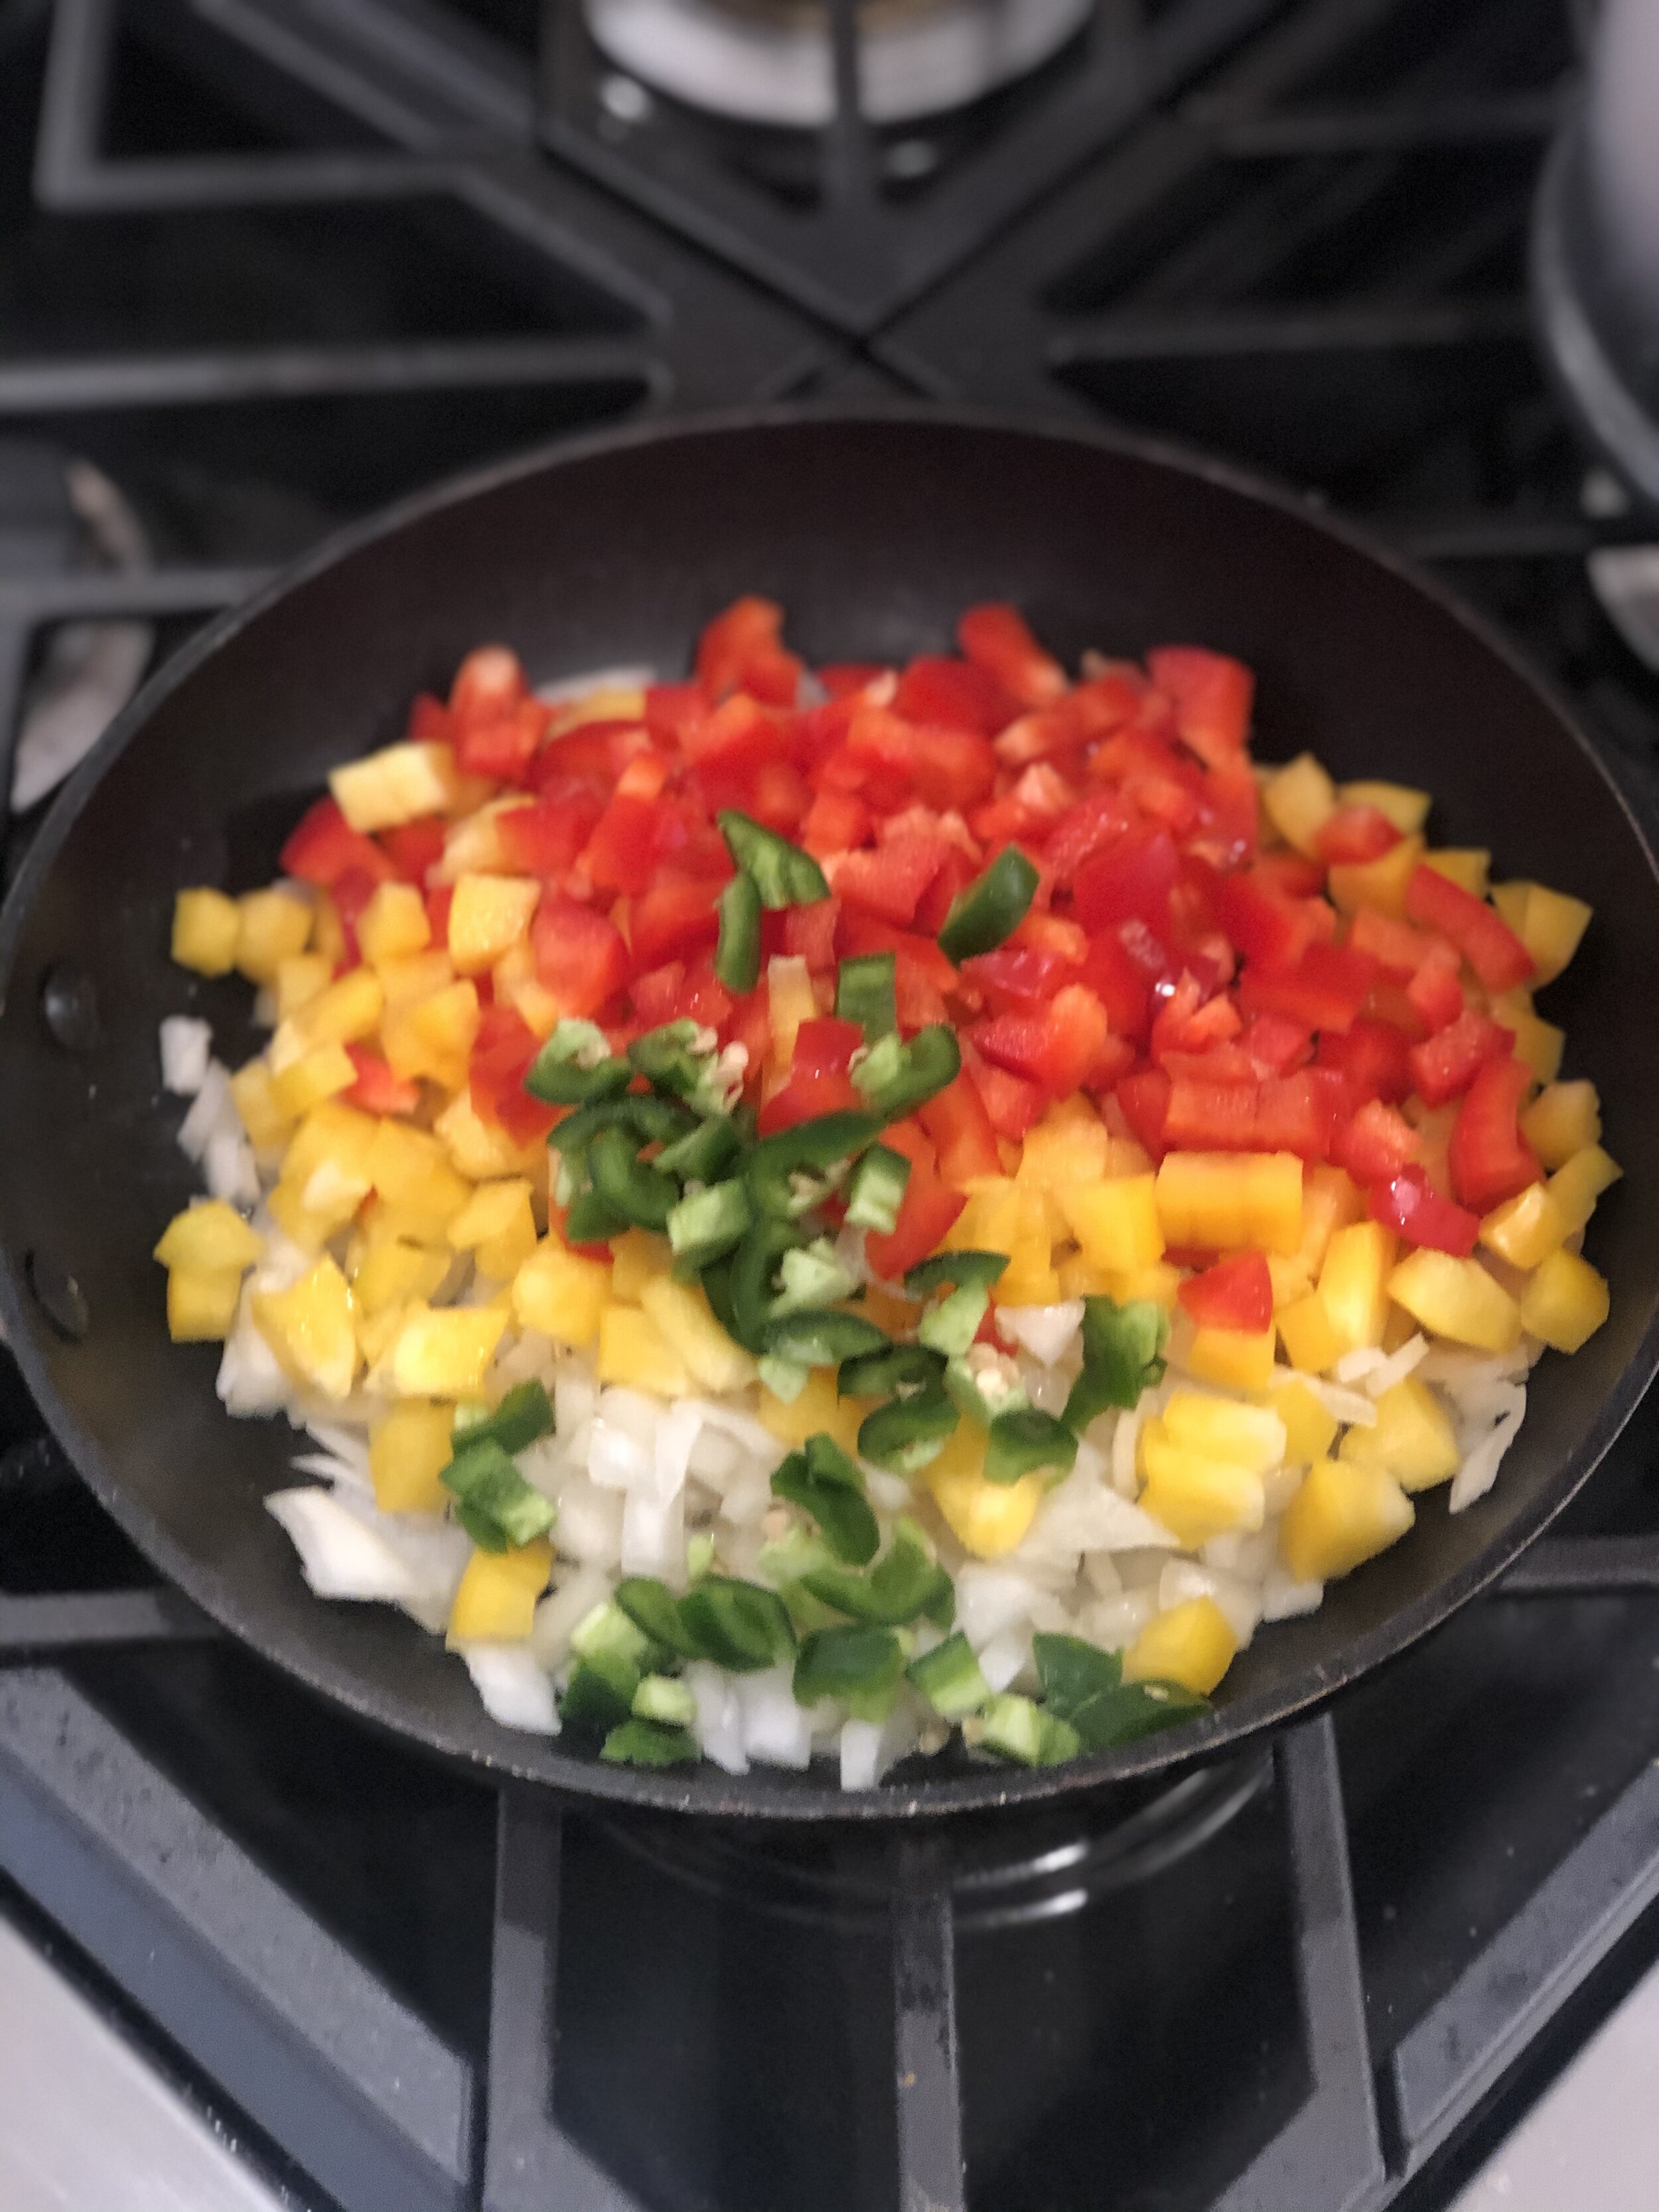
Can we just take a moment to appreciate how ascetically pleasing these colors are?
I let this mixture simmer for about 10 minutes, stirring occasionally. I am basically waiting for the veggies to soften and soak in the spices. Once that happens, I add in the soy sauce and the cooked rice. After stirring to combine, I lower the heat, ensuring that nothing burns but giving the mixture time to absorb all of the flavors.

At this point, I start prepping the shrimp. I buy the big bag of cooked, tail off shrimp at Costco. I cut each shrimp into three pieces and then add it to a pan with heated oil. I add salt, pepper, and minced garlic to the shrimp and stir everything, simmering for only about 2 minutes. I use the pre-cooked shrimp because it is faster and more versatile, but you have to be careful not to overcook it. At this point I lower the heat and add the teriyaki sauce, simmering for about 4-5 minutes.

This is the teriyaki sauce that I typically buy. You can find it pretty much anywhere and it has a great, strong flavor. Once you add garlic to it…ohhh babay.
During this time, I am continuing to stir both the shrimp mixture and the vegetable rice mixture on low heat. Once everything has absorbed, I add the shrimp to the veggies and rice and stir everything together. At this point, I taste test and add more salt and crushed red pepper. When cooking meals like this, I start with a smaller amount of salt because the soy sauce and teriyaki sauce are both pretty salty, making it easy to accidentally over-salt the dish.

And just like that, you are ready to eat! This whole thing took less than a half hour to put together and was super filling. Be warned, between the jalapeño and the crushed red pepper, this was HOT. My fiancé was chugging iced tea and sweating bullets. I like to embrace the sweat so I decided to go with red wine. I kept seeing this brand, California Roots, at Target. It was only $5 and I never bought it because I assumed it was a cheap wine that would give me a headache. When the quarantine started, I finally said what the heck, why spend money on good wine if I am going to be drinking it alone. Gotta say, it is not bad! I have tried their Pinot Grigio and Cab so far and they’re the perfect wine for me to drink off of during the week and not feel guilty about the cost.

Plot twist, we actually sat at the table and ate like adults! Mind you, we were rocking our disheveled quarantine and sweatpants look but hey, still counts! Gus sat by us the whole time praying to the corgi gods that we would drop some food on the floor. Thank goodness we didn’t because this dinner was smokin hot and would have knocked him onto his big corgi butt! We did cave and let him sit at the table with us for a bit. I mean, c’mon with that sweet little face!

INGREDIENTS:
*These spices were distributed between the shrimp and veggie/rice mixtures to taste
5 C cooked, tail-off shrimp (or half of a Costco bag)
1/2 yellow onion
2 bell peppers
1 jalapeno
2 T vegetable oil
1 T salt
1 T pepper
3 T minced garlic (2 for veggie mixture, one to cook shrimp in)
1 T onion powder
1 T dried cilantro
1 T crushed red pepper (more or less based on heat preference)
5 T Soy Sauce
1.5 C cooked white rice
1/3 C Teriyaki Sauce
Passover Dinner- Lemon Pepper Salmon with Spicy Garlic Brussels and Potatoes
We celebrated the start of Passover on Wednesday and I have been trying to think of ways to feed my Jewish fiancé ever since. At the start of each Passover, we head over to J’s parent’s house for dinner, which is always amazing. There is kosher chicken, kotlet, potatoes, eggs, and kosher cake. We stuff ourselves with this amazing food and then leave with me wondering how the heck I am supposed to feed my fiancé like this for a week. I am Italian and my major food groups are pasta, bread, and Doritos….not conducive with being kosher….and on top of that we are in month two of quarantine. I did a big shop at the start of the quarantine and have been trying to cook with what I have to avoid going back to the store. As annoying as this is, it has been a great learning lesson for me- I am very guilty of overbuying and we often throw away a decent amount of food. I think that is my mother in me, always wanting to be prepared should people stop by so that you can whip something up right on the spot.
I think that trying to understand what is kosher and what can be eaten during Passover has been the most difficult part. It feels like they literally can’t eat ANYTHING. Any don’t even try hitting up your friend Google for help…it only gets worse. There are, like, 4385794 types of Jews and they all have different beliefs as to what they can eat during Passover. I have nothing but respect for the Jewish culture but this is like the Olympics of cooking for me. Ultimately, we narrowed it down to decide that he could eat fish, legumes, vegetables, fruit, and matzah (because lord knows I don’t just keep kosher meat lying around). I decided to run with it for the dinner that I made last night, while also being mindful of using foods that were about to go bad.
I had half a bag of Brussel sprouts leftover from Costco, so I decided to make those with salmon, something I always keep in the house. I love a dinner of fish and veggies and so does my fiancé, but he is always hungry again an hour later. To try to combat that, I decided to throw potatoes in the mix to make it a bit more filling (and still hope to wake up with abs in the morning, which has never happened but a girl can dream).
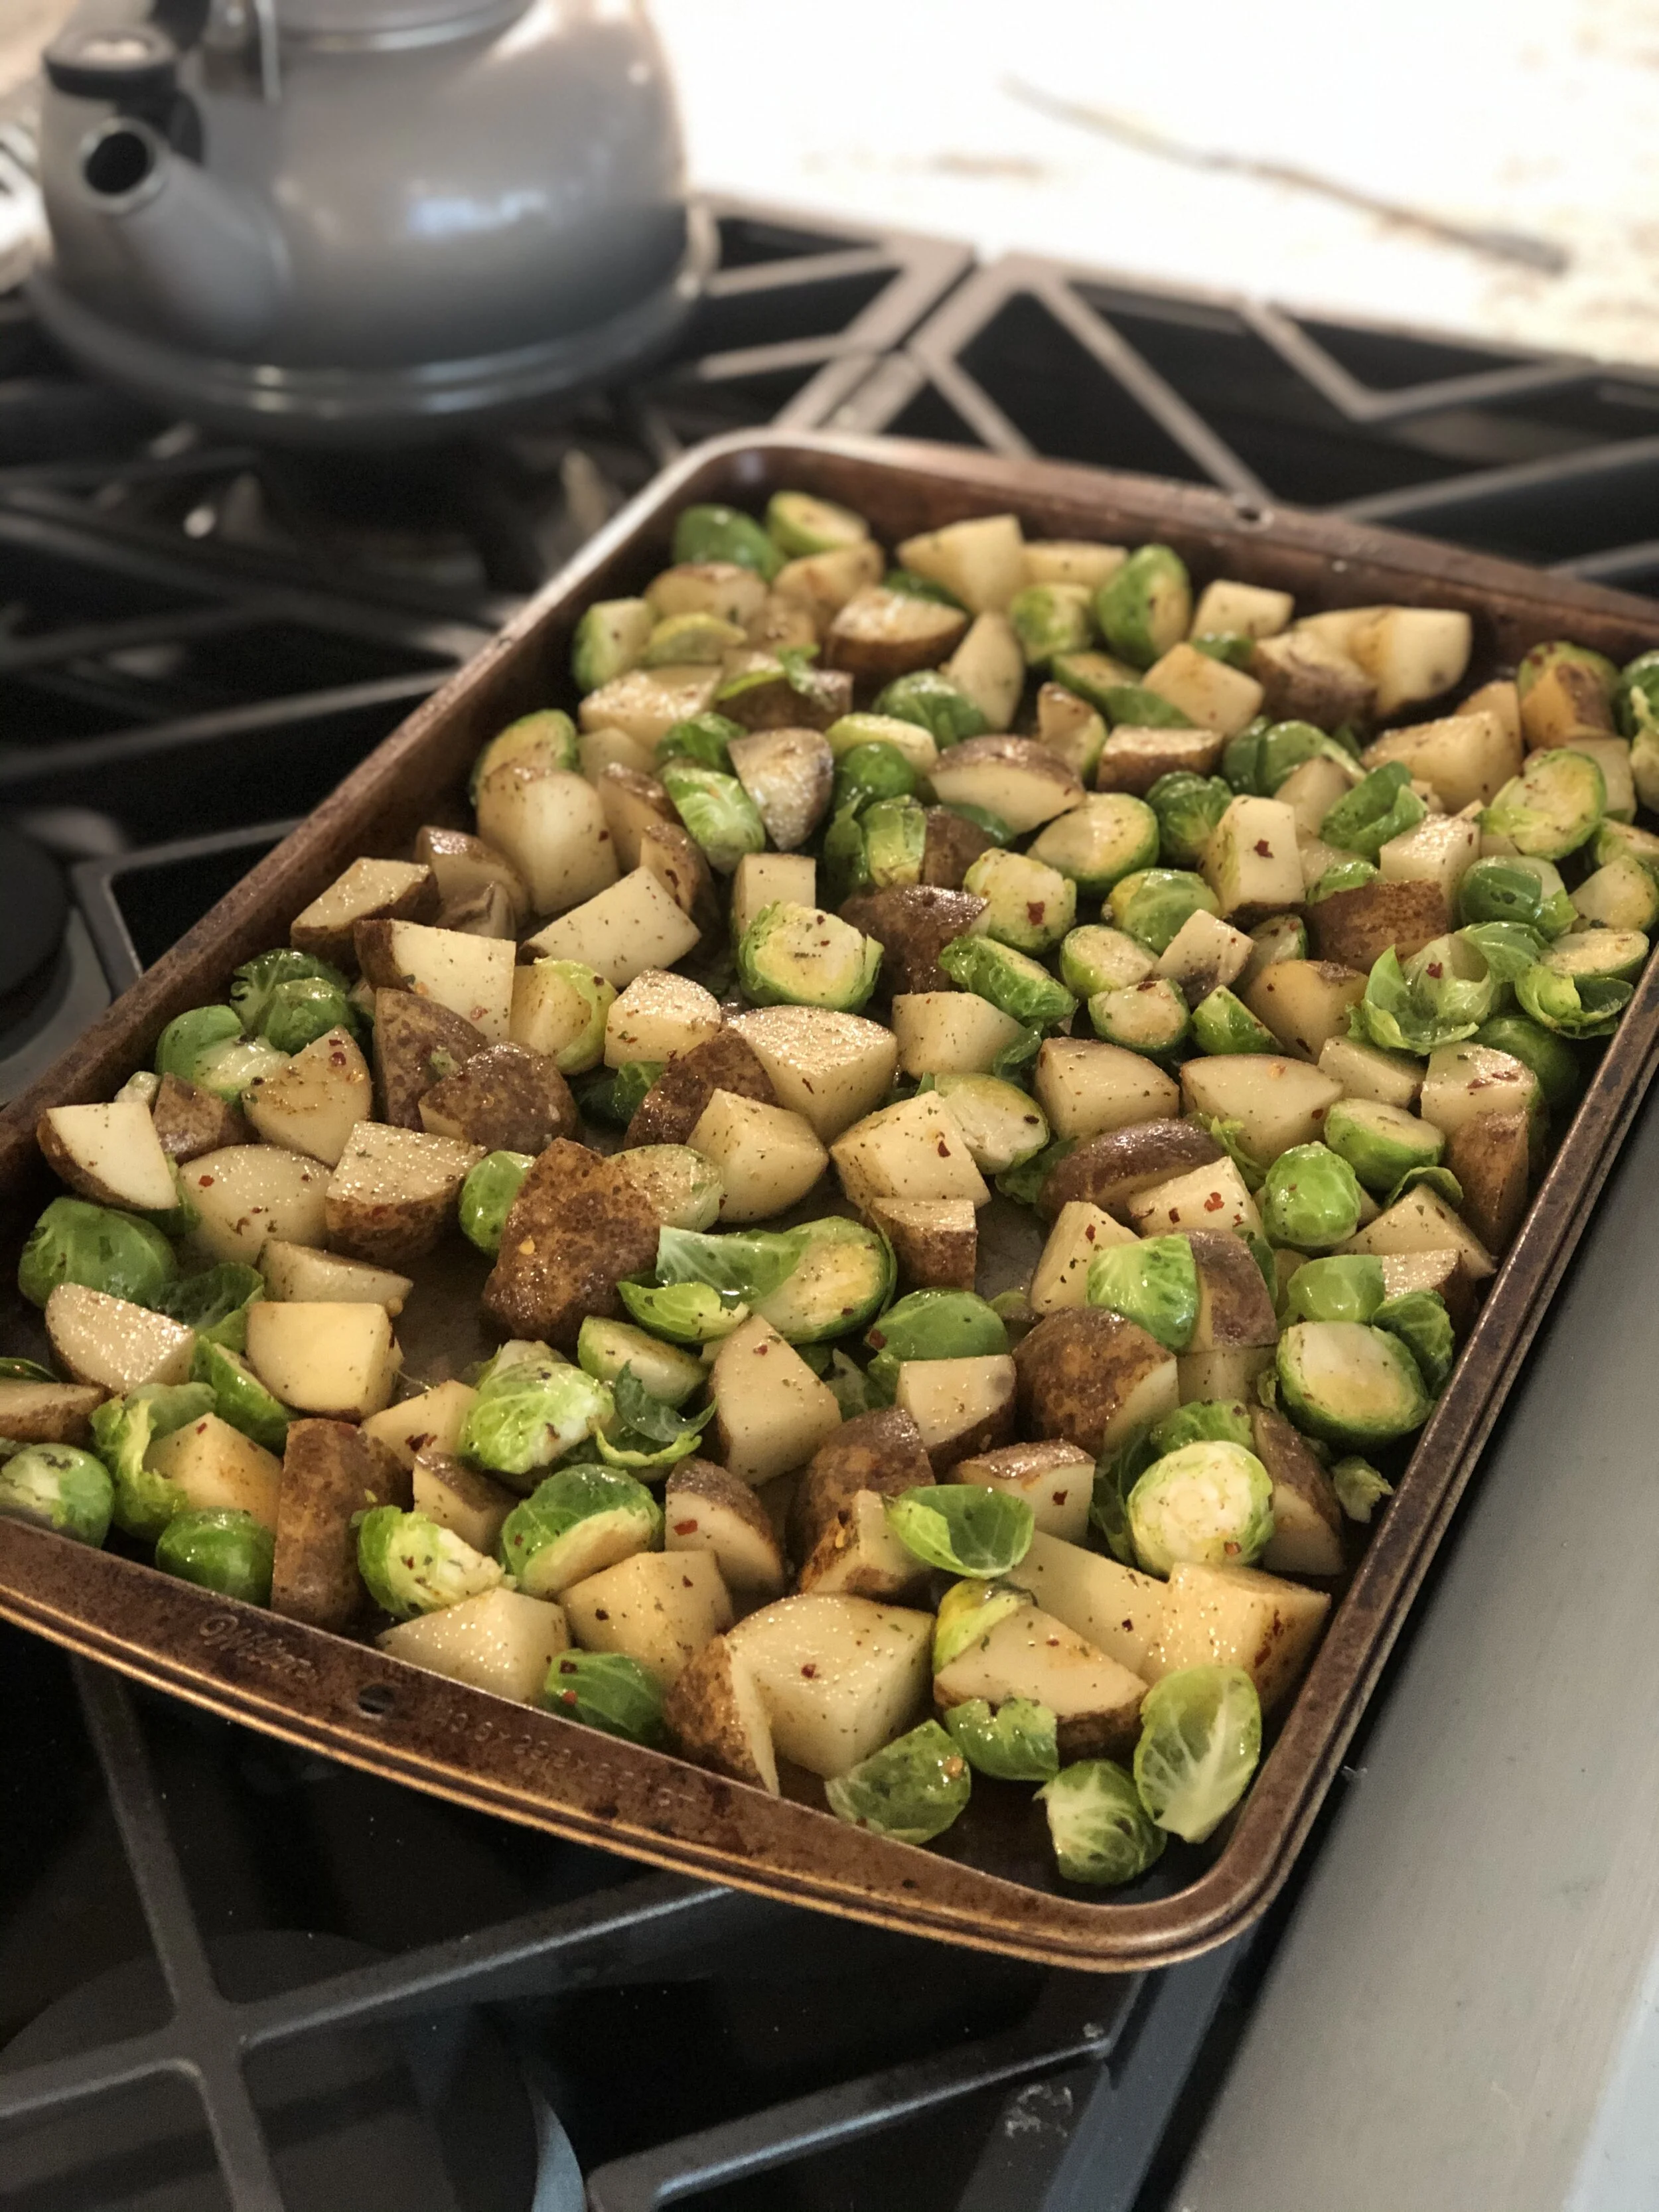
I started by cutting the ends off of the Brussel sprouts and then cutting them in half. I then washed the potatoes and cut them into cubes that were slightly larger than the Brussel sprout pieces. I then added all of the potatoes and Brussels to a bowl to begin seasoning them. I used to always try to season everything on the sheet pan to avoid having to do more dishes. This always resulted in food flying all over the place and my dog finding a potato on the ground and eating it three days later….just mix it in the damn bowl, people. To season, I added the olive oil, Himalayan pink sea salt, black pepper, garlic powder, onion powder, parsley, paprika, and crushed red pepper flakes (I don’t ever really measure ingredients and just eyeball it instead). I usually go heavier on the spicy ingredients and the garlic because we love heat and my Italian aunts have instilled in me that garlic is more important that the air we breathe. I then toss to combine and add the mixture to a sheet pan, spreading the ingredients out so that they cook evenly.

The pan can then be added to a 425 degree oven for 25 minutes. This is not the full cook time, but instead gives me an indicator of when to start the salmon so that everything finishes at the same time. After 25 minutes, I pull the potatoes/brussels out, toss/flip them, and then sprinkle them with parmesan cheese. These then go back in the oven for 15 more minutes and it is time to get started on the salmon.
Don’t judge my cookware, most of these are glorious Ikea products that made it with me through college or hand-me-downs from my mother that are 30 years old….C’monnnnn bridal shower!!!
To start the salmon, I heat the vegetable oil in the pan at high heat. I used to always cook salmon in the oven, but have fallen in love with pan seared salmon the past few months. I feel like you can get a better crust with this method while still keeping the inside tender. To prep the salmon, I sprinkle both sides with Himalayan pink sea salt and black pepper. I then coat it in a generous amount of lemon pepper seasoning, ensuring I cover every inch.

Once the oil in the pan is super hot, I add the salmon filets. These typically cook for about 5 minutes on each side, depending on the size of the salmon. (I always buy the huge salmon from Costco and then divide it up into two-person portions and then freeze). Once I see a blackened crust forming, I flip the salmon to cook on the other side. This is where the high heat is critical because it allows me to get a crust quickly without overcooking the fish. The downside to this is that the oil usually start spitting and gets all over the stove and usually hits me in the face a few times. The secret is to drink enough wine while cooking that you literally can’t even feel your face getting burned. You’re welcome.

Once the salmon is done, I pull the potatoes out of the oven and sprinkle with another coat of Himalayan pink salt and Parmesan cheese (because health). At this point it is ready to serve. This meal is super easy- the prep took less than 10 minutes and then I just had to turn the salmon and toss the potato/brussel mixture.

Typically, we like to sit down to dinner at the table. This is a sacred time for us as we typically work long hours and look forward to catching up on our days. With this quarantine, however, we see plenty of each other to the point that it’s like, wow, there you are…again. So, we have been eating more dinners on the couch during this quarantine while watching a show or a movie. This meal was fiancé approved and I accomplished the impossible….he was actually full! Now if only we could only eat in peace without a corgi watching every bite and drooling on our legs…

INGREDIENTS:
Brussel Sprout/Potatoes:
5-6 small russet potatoes ( or 3 large potatoes)
4 C brussel sprouts (or half of a large bag)
2 T Olive Oil
2 T Himalayan pink sea salt
1 Tsp Black Pepper
1 T Garlic Powder
1 T Onion Powder
1 T Crushed Red Pepper
1 Tsp Paprika
1 Tsp Parsley
1/4 C Parmesan Cheese
Lemon Pepper Salmon:
2 Salmon Filets
2 T Vegetable Oil
1 Tsp Himalayan pink sea salt
1 Tsp Black Pepepr
2 T Lemon Pepper Seasoning